First I went to Goodwill to find an old worn-in pair of jeans specifically for this purpose. I wasn't about to buy a $40 pair of jeans just to cut 50% of them off, and I didn't have any jeans I was willing to cut up at the time either. So I found this pair for $4.50 or so (I believe they're all around the same price), and thought they'd be perfect!
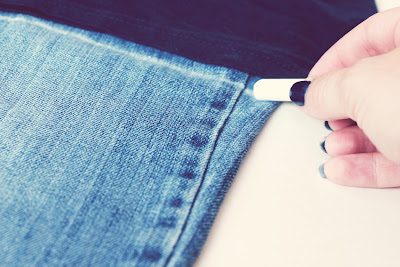
The first thing I do to make shorts out of jeans is take another pair of shorts that I like the length of, and trace the legs of the shorts on the jeans with the crotches matched up. I just used an old pair of Soffee shorts (love those!) and traced a line across the edge with a bit of chalk (so it'll wash off easily). If you want the shorts to be the same length as your other ones in the front and back, make sure you fit the example shorts accordingly--so when you're drawing a line for the front of your denim, trace the front of the shorts, and when you're tracing on the back, use the back of the shorts. Trust me, they are probably different (longer in the back, usually).
Cut a few inches below the chalk line. This will make it so you can try on your shorts and decide if the line is good, or if it needs to be raised/lowered. You can also see if you'd like to hem the shorts, or keep a rough edge so they fray. I chose to let mine fray.
Sew with matching (or close) thread along the final chalk line. This will make it so your shorts can still fray, but they won't keep fraying and getting shorter with every single wash. So wherever you put the stitches is where your shorts will stop fraying.
Cut off the excess fabric, leaving a little space below the thread. I left about a centimeter, because I wasn't sure how much they'd fray on the first wash.
Throw the shorts in the washer (especially if you get them from Goodwill or a thrift store like I did), and if you're not worried about shrinkage, you can put them in the dryer, too. I personally don't ever put my denim in the dryer, unless I'm really in a rush, so I let these air dry.
Your shorts will fray more with a few washes, so don't be discouraged if they don't look exactly how you want after the first wash.
I also wanted to add a little more flair to these since I have 3 or 4 similar pairs, so I added some small studs that I had left over from my studded shoes tutorial that I didn't know what to do with. I've worn my shorts a few times already and I love them! Hope this was helpful, and if you have any questions, don't hesitate to ask!


These are really cute, thanks for the idea!
ReplyDeleteThanks! :) And no problem, hope you enjoy!
ReplyDeleteI <3 soffee shorts, too! Love the shorts, but any ideas for what to do with the extra denim?
ReplyDeleteI'm so doing this...thanks for the DIY!
ReplyDeleteYes, they're so comfy! And actually I've kept old denim from doing this for patching up other jeans when they get holes, and I'm currently working on a denim wristlet that I'll put up a tutorial for later, so check back! :) Really though, you could do tons with it--makeup bags, a little clutch (similar to the wristlet I'm making), some kind of jewelry, the possibilities are endless :)
ReplyDeleteAnd Erin, no problem! :D
I was just wondering do the jeans fray alot further in future washes? If so should I add an extra inch on so they don't fray past the mark I want them too? :) Thank you :)
ReplyDeleteThey frey a little bit more each time, but never past the mark where you sewed it! Mine still aren't even to the sewed line and I wear them frequently and wash them frequently, but on my other pair they never go past where I sewed it. You're welcome! :) Hope you love em!
DeleteAwesome tutorial! Don't the studs come off while washing?
ReplyDeleteNo ma'am, not if you use the prong type like I did! I wash mine all the time and none of them have fallen off :) And thank you!
DeleteWow...been cuttin jeans off since the 70's...never occurred to me to stitch the leg to keep fray'g minimized...duh! Lol! Tx :)
ReplyDeleteHahaha well now you know! :) No problem, enjoy! :)
DeleteGreat tutorial!!!
ReplyDeleteThank you, glad you liked it!! :)
DeleteNice! I like your diy projects.
ReplyDelete