Showing posts with label jean. Show all posts

Monday, May 13, 2013

DIY Old Jeans to High-Waisted Shorts Restyle

After a 4-month long hiatus, I'm finally back! I've done a few projects with the intention of adding them to my blog, but laziness sets in and we end up here--months later, with no posts.

BUT! I liked my most recent project too much to keep it off my blog, and I'm now on summer vacation, so I have time!


For this restyle, you'll need:

  • Old or thrift pair of jeans
  • Another pair of shorts you like the fit of (not necessary, but very helpful)
  • Chalk
  • Scissors
  • Bucket (or sink) big enough to fit your shorts in comfortably
  • Bleach (optional)
  • Sandpaper (optional)

I knew I wanted to create these shorts for a while, so when I got home from college for the summer, I jumped right in to thrifting. I found these babies at Goodwill for around $5, I think. I tried on quite a few pairs of jeans, mostly just looking at how much I liked the butt/pockets and if they were comfortable in the leg, and aiming for higher-waisted pants. Not too hard to find in the ladies section of a thrift store. So I found these Levis that I really liked :)


After matching them up with my favorite pair of shorts, I marked them with chalk where I wanted to cut them. For how to cut them the right length, see my blog post from last summer on how to make cutoff jean shorts here. I think I marked these about an inch below where the other shorts landed.

Once you mark the shorts, try them on to kind of eyeball where they'll land. If you like it, cut them off. You can always cut more, but you can't add fabric back on, so make sure you're okay with cutting off that much!

The next step, bleaching your shorts, is optional. I knew I wanted mine a lighter shade, and the bleach also makes them a little softer, so I went with it. When you've cut them to the length you want them at, take your bucket and put some water in it, just enough so that the shorts will be completely submerged. I did a little research before to figure out how much bleach to add to the water, and I found all kinds of responses, from "two parts bleach, one part water" (WAY too much, in my opinion!) to "one part bleach, three parts water" to "a bucket of water plus a half cup of bleach." I happened to have another pair of cutoffs from last summer that I never did anything with aside from cut them from jeans, so I tested my first bleaching on them (didn't want to ruin my Levis!). For the first test run, I used 9 cups of water and 3 cups of bleach, so 3:1 ratio of water to bleach. OVERBOARD. I mixed it and then put the shorts in the bucket, and turned/swished them after 30 minutes. After only an hour, they were almost yellow from the bleach!


 While you might want that look, that's definitely not what I was going for. So glad I tested it first!

SO. For my real run-through, I filled the bucket up with a little more water than the first time, probably somewhere around 15-20 cups, and added ONE cup of bleach. This way, it's a whole lot more controllable. I'd definitely recommend doing a ratio with less bleach than you think you'll need. It might take longer, but you'll be able to control the lightness of  your shorts much more easily.

I still came back every 30 minutes to flip the shorts, just to make sure they were evenly covered. Mine were in the bleach around 3 hours. Keep in mind that they are wet, so they'll turn out even lighter when they're dry. That's something I definitely didn't think about haha.

When you get them to a color you're happy with, rinse them thoroughly in cold water in the sink, then throw them in the washer. I put a few white towels in the mix too, just to help the washer out a little bit.

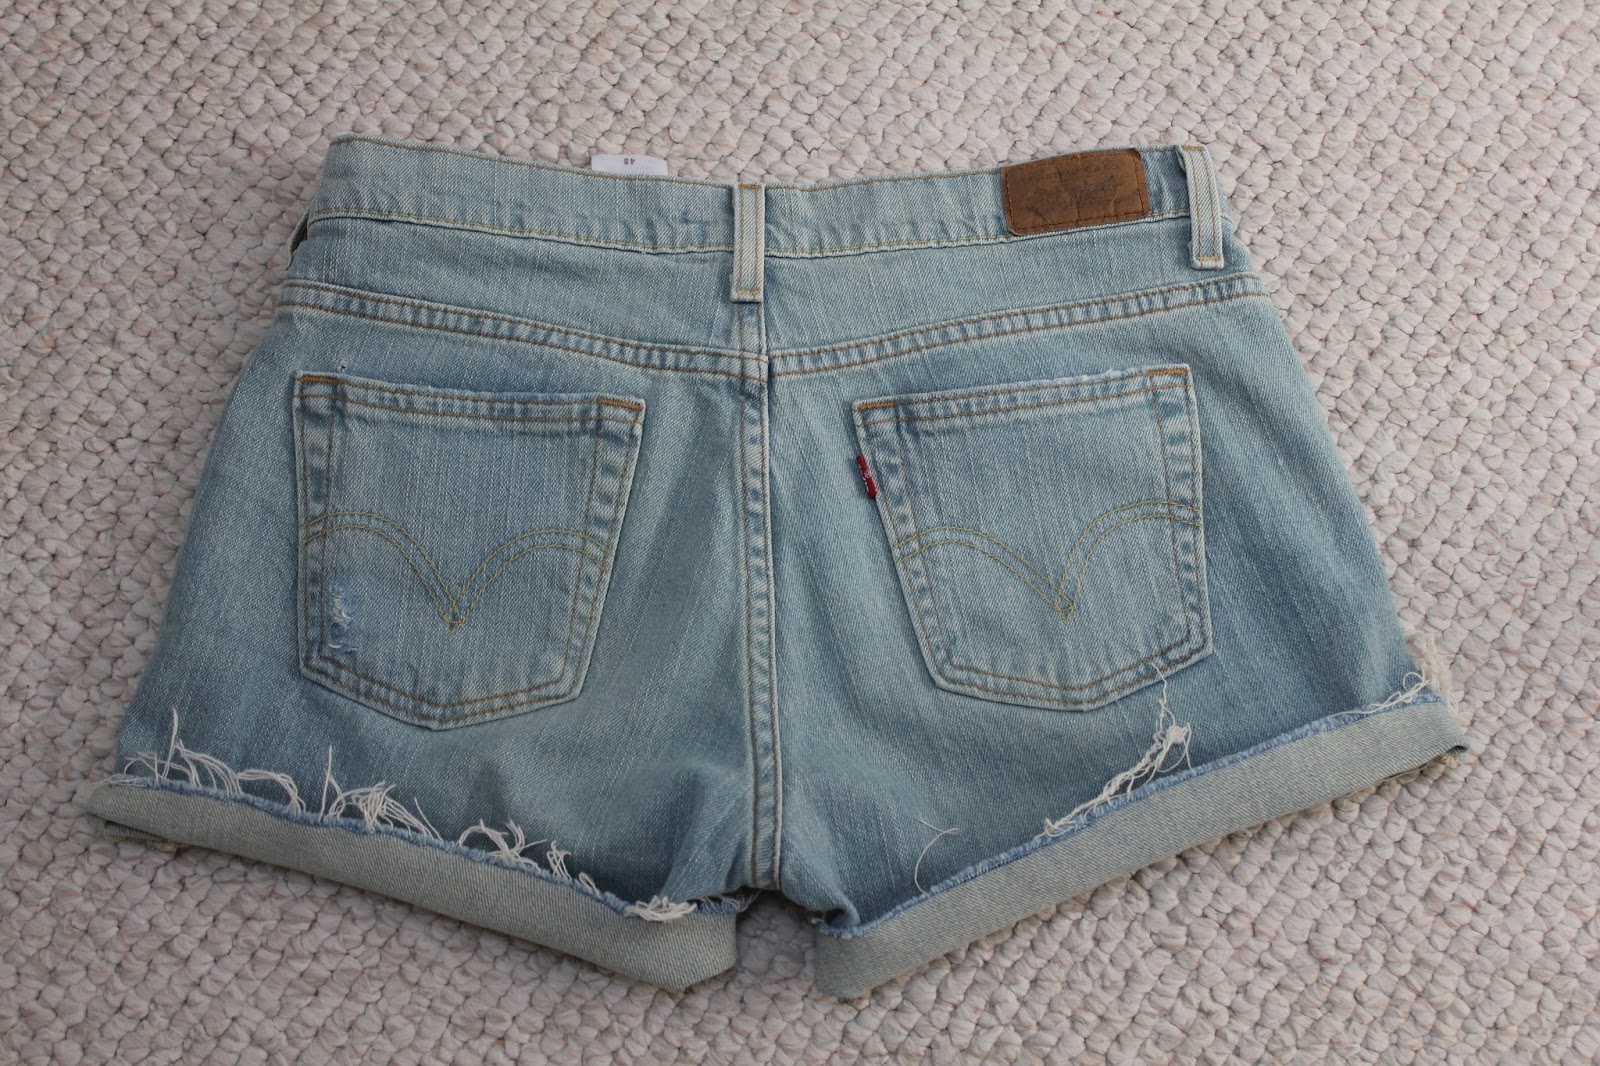
And here's how they turned out! :) I didn't stitch these like I did in my other jean cutoff tutorial, because I wasn't sure what length I liked. I like them rolled and not rolled!


I also gave these a tiny but of character with distressing. I used the scissors to rough up the tops of the pockets and a razor to scrape up around the pockets a little. For the most part, I wanted to keep them pretty clean looking, but I wanted to do a little something :)


 So there ya have it! Oh and I just got the white top too at Salvation Army for like a buck, score! I'm all ready for summer now, as soon as it warms up here in chilly Michigan! :)


Monday, June 25, 2012

DIY Studded Cutoff Jean Shorts

I can never ever find shorts that fit me new from the store. I don't know what it is: some shorts are made for girls without butts, some fit perfectly in the butt but squeeze my legs like there's no tomorrow, and some I can't even get past my thighs until I go up a few sizes, and then they're way too big on my waist. Either way, for the past few years I've started just making old jeans into shorts. I decided a few weeks ago that I was getting tired of my old shorts and needed a new pair, so I made these!

First I went to Goodwill to find an old worn-in pair of jeans specifically for this purpose. I wasn't about to buy a $40 pair of jeans just to cut 50% of them off, and I didn't have any jeans I was willing to cut up at the time either. So I found this pair for $4.50 or so (I believe they're all around the same price), and thought they'd be perfect!


The first thing I do to make shorts out of jeans is take another pair of shorts that I like the length of, and trace the legs of the shorts on the jeans with the crotches matched up. I just used an old pair of Soffee shorts (love those!) and traced a line across the edge with a bit of chalk (so it'll wash off easily). If you want the shorts to be the same length as your other ones in the front and back, make sure you fit the example shorts accordingly--so when you're drawing a line for the front of your denim, trace the front of the shorts, and when you're tracing on the back, use the back of the shorts. Trust me, they are probably different (longer in the back, usually).


Cut a few inches below the chalk line. This will make it so you can try on your shorts and decide if the line is good, or if it needs to be raised/lowered. You can also see if you'd like to hem the shorts, or keep a rough edge so they fray. I chose to let mine fray.


Sew with matching (or close) thread along the final chalk line. This will make it so your shorts can still fray, but they won't keep fraying and getting shorter with every single wash. So wherever you put the stitches is where your shorts will stop fraying.


Cut off the excess fabric, leaving a little space below the thread. I left about a centimeter, because I wasn't sure how much they'd fray on the first wash.


Throw the shorts in the washer (especially if you get them from Goodwill or a thrift store like I did), and if you're not worried about shrinkage, you can put them in the dryer, too. I personally don't ever put my denim in the dryer, unless I'm really in a rush, so I let these air dry.


Your shorts will fray more with a few washes, so don't be discouraged if they don't look exactly how you want after the first wash.


I also wanted to add a little more flair to these since I have 3 or 4 similar pairs, so I added some small studs that I had left over from my studded shoes tutorial that I didn't know what to do with. I've worn my shorts a few times already and I love them! Hope this was helpful, and if you have any questions, don't hesitate to ask!